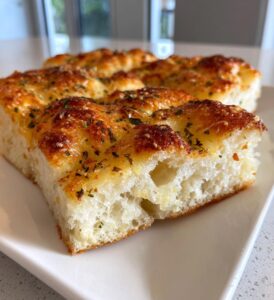
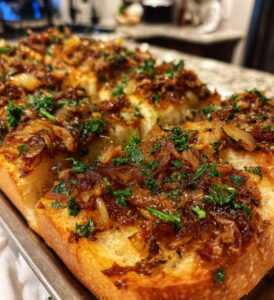
Oh my goodness, let me tell you about this Baklava Cheesecake! It’s like two of my favorite desserts had a delicious baby, and I can’t get enough of it. The creamy richness of the cheesecake perfectly complements the nutty, honey-drenched flavors of traditional baklava. I remember the first time I made this; my friends were skeptical at first, but their eyes lit up with every bite! The crunch of the walnuts, the warmth of cinnamon, and that sweet honey drizzle—it’s a flavor explosion that just makes your taste buds dance. Trust me, once you try this, you’ll be dreaming about it long after the last slice is gone. It’s perfect for special occasions, or even just a cozy night in when you want to treat yourself. So, roll up your sleeves and let’s dive into making this show-stopping dessert that’s sure to impress anyone lucky enough to share it with you!
Looking for the perfect drink to enjoy with your Baklava Cheesecake? Try this Vanilla Cinnamon Milk Tea — smooth, spiced, and a cozy complement!

Ingredients List
Gathering the right ingredients is key to making this Baklava Cheesecake truly special! Here’s what you’ll need to whip up this delightful dessert:
- 1 1/2 cups graham cracker crumbs
- 1/2 cup unsalted butter, melted
- 2 cups cream cheese, softened (make sure it’s at room temperature for easy mixing!)
- 1 cup granulated sugar
- 3 large eggs
- 1 teaspoon vanilla extract
- 1 cup chopped walnuts (feel free to chop them coarsely for a bit of crunch!)
- 1/2 cup honey (the good stuff, trust me—it makes a difference!)
- 1 teaspoon ground cinnamon
- 1/4 cup water
Make sure to have everything ready before you start. It’ll make the process so much smoother and more enjoyable! Now, let’s get cooking!
Craving another nutty delight? Try these White Chocolate Cranberry Pecan Clusters — crunchy, sweet, and festive!
How to Prepare Baklava Cheesecake
Alright, let’s jump into making this delicious Baklava Cheesecake! Follow these steps, and I promise you’ll end up with a show-stopping dessert that’ll have everyone begging for the recipe.
Step 1: Preheat the Oven
First things first, you’ll want to preheat your oven to 350°F (175°C). Preheating is super important because it ensures that your cheesecake bakes evenly and helps achieve that lovely, creamy texture. So don’t skip this part! While the oven is warming up, you can get everything else ready.
Step 2: Prepare the Crust
Now, let’s make that crust! In a mixing bowl, combine the graham cracker crumbs with the melted butter until it looks like wet sand. You want to make sure everything is well mixed—this is what holds our cheesecake together! Next, take a springform pan (I love using these because they make it so easy to remove the cheesecake later) and firmly press the crumb mixture into the bottom, spreading it out evenly. It should be compact and well-formed, so don’t be shy about using your hands or a flat-bottomed glass to press it down. Once it’s all set, put it aside while we move on to the filling.
Step 3: Make the Cheesecake Filling
In a large mixing bowl, grab that softened cream cheese and beat it together with the sugar until it’s smooth and creamy—this part is so satisfying! I usually use an electric mixer to make it easier, but a whisk works too if you’re feeling strong. Then, add in the eggs one at a time, mixing well after each addition. This step is crucial because it helps incorporate air into the batter, making it light and fluffy. After that, stir in the vanilla extract, chopped walnuts, and ground cinnamon until everything is well combined. The smell will be heavenly! You’re almost there!
Step 4: Assemble and Bake
Now it’s time to bring it all together! Pour that creamy cheesecake filling over the crust in the springform pan. Use a spatula to smooth the top, making it as even as possible. Then, pop it into your preheated oven and bake for about 50-60 minutes. You’ll know it’s done when the edges look set, but the center still has a slight jiggle—don’t worry, it’ll firm up as it cools! Once it’s done, take it out and let it cool for about 30 minutes before we move on to the next step.
Step 5: Prepare Honey Drizzle
While your cheesecake is cooling, let’s make that magical honey drizzle! In a small saucepan, combine the honey with 1/4 cup of water. Bring it to a boil over medium heat, stirring occasionally. Once it starts bubbling, let it boil for about 2-3 minutes until it slightly thickens. This drizzle is the cherry on top of your Baklava Cheesecake, adding that sweet, sticky goodness we all love!
Step 6: Cool and Refrigerate
Finally, it’s time to let this beauty rest. After your cheesecake has cooled for about 30 minutes, drizzle that honey mixture over the top while it’s still warm. Then, cover it up and stick it in the refrigerator for at least 4 hours—or even overnight if you can wait! This chilling time allows all those amazing flavors to meld together beautifully. Trust me, the wait will be worth it!
Need another cheesecake-inspired dessert? Try these Strawberry Cheesecake Cookies — soft, creamy, and berry-sweet!
Nutritional Information Disclaimer
While I love sharing the nutritional details of my Baklava Cheesecake, it’s important to note that these values can vary significantly based on the specific ingredients and brands you use. So, while I provide a general estimate, your results may differ! If you’re keeping track of your intake or have dietary restrictions, I encourage you to calculate the nutrition based on the exact ingredients you choose. This way, you can enjoy every bite without any surprises. Remember, cooking is all about finding what works best for you, so feel free to make adjustments as needed!
Why You’ll Love This Recipe
Seriously, there are so many reasons to fall in love with this Baklava Cheesecake! It’s not just another dessert; it’s a unique and delightful fusion of flavors that will have your friends and family raving. Here are some of the top reasons why you’ll want to make this masterpiece:
- Unique Flavor Combination: The rich, creamy cheesecake perfectly complements the nutty, honey-sweet layers of baklava. Each bite is a delightful surprise!
- Show-Stopping Dessert: This cheesecake is a real head-turner! It’s perfect for gatherings, holidays, or just when you want to impress someone special.
- Easy to Make: Even though it sounds fancy, this recipe is super simple! With straightforward steps, you’ll feel like a pro in the kitchen.
- Rich and Satisfying: The combination of cream cheese, nuts, and honey creates a dessert that feels indulgent without being overly heavy.
- Perfect for Any Occasion: Whether it’s a birthday, a holiday feast, or just a Tuesday night, this Baklava Cheesecake fits right in.
- Customizable: Feel free to experiment with different nuts or spices to make it your own! The possibilities are endless.
Trust me, once you try this Baklava Cheesecake, you’ll be adding it to your regular dessert rotation! It’s a sweet adventure you won’t want to miss out on!
Tips for Success
Alright, let me share some of my best tips for making sure your Baklava Cheesecake turns out absolutely perfect! First off, make sure your cream cheese is properly softened. Trust me, it makes a world of difference when you beat it into that silky, smooth mixture. If it’s too cold, you’ll end up with lumps, and nobody wants that!
Another key point is to avoid overmixing once you add the eggs. Just mix until combined; overmixing can lead to a dense cheesecake instead of the light, fluffy texture we’re aiming for. Also, don’t be shy about checking for doneness. Remember, the center should have a slight jiggle when you take it out—it’ll firm up as it cools!
And here’s a little pro tip: If you notice the edges browning too quickly, you can cover them with a strip of aluminum foil to protect them while the center continues to bake. Lastly, patience is key when it comes to the chilling process. Letting it rest for at least 4 hours—or overnight—will allow those flavors to meld beautifully. Enjoy the process, and happy baking!
Love pairing cheesecake with coffee? Try this Tiramisu Iced Coffee — bold, creamy, and indulgent!
Variations
One of the best parts about this Baklava Cheesecake is how versatile it is! If you’re feeling adventurous, here are some fun ideas to switch things up:
- Nut Variety: While walnuts are a classic choice, you could try using pistachios or almonds for a different flavor profile. Each nut brings its own unique twist!
- Spice it Up: Want to add a little warmth? Consider mixing in a dash of nutmeg or even a pinch of cardamom with the cinnamon. It gives the cheesecake a cozy, aromatic touch.
- Fruit Swirl: For a fruity twist, you can fold in some chopped dried apricots or figs into the filling before baking. It adds a delightful sweetness and texture!
- Chocolate Drizzle: If you’re a chocolate lover, why not drizzle some melted dark chocolate over the top before serving? It pairs beautifully with the honey and nuts!
Feel free to experiment with these variations and make this Baklava Cheesecake your own. The possibilities are endless, and I can’t wait to hear what combinations you come up with!
Serving Suggestions
When it comes to serving your Baklava Cheesecake, there are a few delightful pairings that can enhance the experience even further! First up, I absolutely love serving it with a dollop of whipped cream on the side. The lightness of the cream balances the richness of the cheesecake beautifully and adds an airy touch. You might also want to consider a scoop of vanilla ice cream—this combo is pure magic, especially when the cheesecake is slightly chilled!
For a lovely contrast, serve alongside a fresh fruit salad or some sliced berries. The tartness of the fruit cuts through the sweetness, making each bite even more refreshing. And if you’re feeling fancy, drizzle a little extra honey or a sprinkle of crushed nuts on top before serving for that extra wow factor. Trust me, these simple touches will elevate your Baklava Cheesecake to a whole new level of deliciousness!
Storage & Reheating Instructions
Storing your Baklava Cheesecake properly is key to keeping it delicious for days to come! Once it’s fully chilled and set, cover the cheesecake tightly with plastic wrap or transfer it to an airtight container. It’ll stay fresh in the refrigerator for up to 5 days, but I bet it won’t last that long because it’s just so good!
If you happen to have leftovers (which is a rare gem!), you can also freeze individual slices. Just wrap each slice in plastic wrap and place them in a freezer-safe bag. They’ll keep well for up to 2 months. When you’re ready to enjoy, simply thaw it in the refrigerator overnight. No need to reheat this beauty—serve it chilled, and it’ll taste just as amazing as the first day you made it. Enjoy every last bite!
Want another Mediterranean-inspired bake? Try this Greek Honey Cake — fragrant, moist, and full of tradition!
Print
“Baklava Cheesecake: 5 Comforting Layers of Deliciousness”
- Total Time: 4 hours 30 minutes
- Yield: 8 servings 1x
- Diet: Vegetarian
Description
A rich dessert combining the flavors of baklava and cheesecake.
Ingredients
- 1 1/2 cups graham cracker crumbs
- 1/2 cup unsalted butter, melted
- 2 cups cream cheese, softened
- 1 cup sugar
- 3 large eggs
- 1 teaspoon vanilla extract
- 1 cup chopped walnuts
- 1/2 cup honey
- 1 teaspoon ground cinnamon
- 1/4 cup water
Instructions
- Preheat oven to 350°F (175°C).
- Mix graham cracker crumbs and melted butter, then press into a springform pan.
- Beat cream cheese and sugar until smooth.
- Add eggs one at a time, mixing well after each.
- Stir in vanilla, walnuts, and cinnamon.
- Pour mixture over crust and smooth the top.
- Bake for 50-60 minutes until set.
- In a small saucepan, combine honey and water, bring to a boil.
- Drizzle honey mixture over cheesecake while still warm.
- Cool and refrigerate for at least 4 hours before serving.
Notes
- Serve chilled for the best flavor.
- Top with additional chopped nuts if desired.
- Store leftovers in the refrigerator.
- Prep Time: 30 minutes
- Cook Time: 60 minutes
- Category: Dessert
- Method: Baking
- Cuisine: Middle Eastern
Nutrition
- Serving Size: 1 slice
- Calories: 350
- Sugar: 25g
- Sodium: 200mg
- Fat: 20g
- Saturated Fat: 10g
- Unsaturated Fat: 8g
- Trans Fat: 0g
- Carbohydrates: 30g
- Fiber: 2g
- Protein: 5g
- Cholesterol: 60mg
Keywords: Baklava Cheesecake, dessert, cheesecake, baklava
FAQ Section
Can I make Baklava Cheesecake ahead of time?
Absolutely! In fact, making it a day in advance is one of my favorite tips. The flavors have more time to meld together, and you’ll save yourself some stress on the day you plan to serve it. Just be sure to cover it well in the fridge!
What can I use if I don’t have a springform pan?
If you don’t have a springform pan, no worries! You can use a regular round cake pan, but make sure to line it with parchment paper for easier removal. Just be gentle when taking it out, and use a spatula to help lift it out if needed.
How do I know when my Baklava Cheesecake is done?
Great question! You’ll want to look for the edges to be set while the center still has a slight jiggle. It may seem undercooked at first, but don’t worry! It will firm up nicely as it cools.
Can I use low-fat cream cheese?
Yes, you can! While using low-fat cream cheese will give you a slightly different texture, it still works well in this Baklava Cheesecake recipe. Just keep in mind it may not be quite as rich and creamy as the full-fat version.
What toppings do you recommend for Baklava Cheesecake?
Oh, I love this part! You can top it with a drizzle of extra honey, a sprinkle of chopped nuts, or even a dusting of cinnamon for a little extra flair. Fresh berries or a dollop of whipped cream also make lovely additions for serving!
Want another Mediterranean-inspired bake? Try this Greek Honey Cake — fragrant, moist, and full of tradition!
For daily recipes you can follow me on Facebook and Pinterest.


