Vanilla Cream Caramels are one of those melt-in-your-mouth treats that instantly take you back to cozy kitchens, grandma’s recipes, and the warmth of the holidays. Whether you’re looking to create homemade gifts, impress at family gatherings, or simply indulge in a soft, buttery delight, these caramels hit all the right notes.
In this detailed guide, you’ll learn how to make vanilla cream caramels completely from scratch, even if you’re a beginner in candy-making. From ingredients and tools to storage and creative flavor twists, we’ll cover everything you need. You’ll also discover tips to avoid common mistakes and answers to the most frequently asked questions about this classic treat.
Check out our delicious Banana Zucchini Muffins for more sweet inspiration after you master this caramel recipe.
Introduction to Vanilla Cream Caramels
What Are Vanilla Cream Caramels?
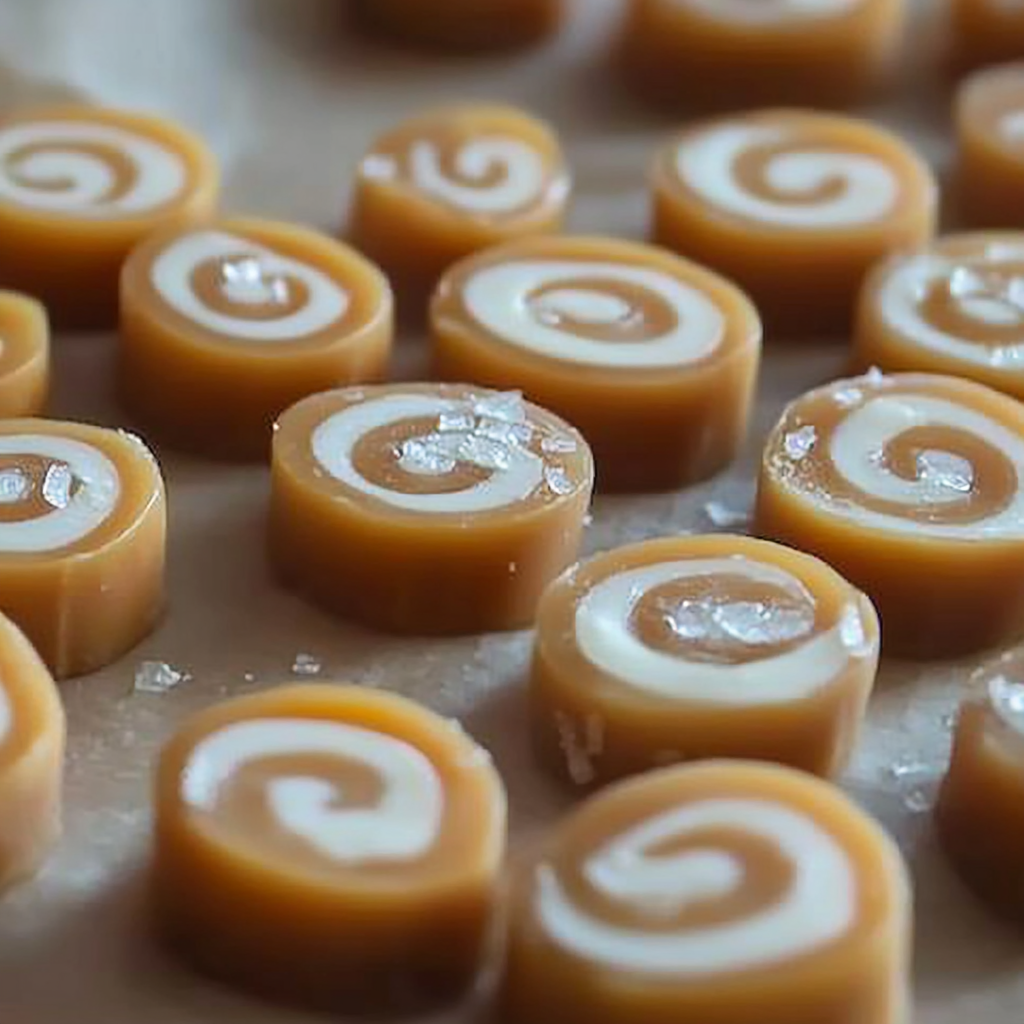
Vanilla cream caramels are soft, rich candies made by cooking sugar, butter, heavy cream, and vanilla extract to perfection. Unlike hard candies, these treats are chewy yet tender, with a silky texture that dissolves on the tongue. They’re typically cut into squares and wrapped individually for freshness or gifting.
Their secret? A balance of high-quality cream, slow cooking, and a strong vanilla profile. Vanilla gives the caramels their characteristic depth of flavor, often enhanced by real vanilla bean or paste for a gourmet touch.
While store-bought caramels are convenient, they rarely compare to the flavor and softness of homemade versions. That’s why making your own is worth every bit of effort.
The Appeal of Homemade Caramels Over Store-Bought
Store-bought caramels are usually mass-produced using preservatives and artificial flavorings. They can be overly sweet, rubbery, or even taste synthetic. On the other hand, homemade vanilla cream caramels are customizable. You control the ingredients, texture, and flavor intensity.
Here’s why you’ll love making them at home:
| Homemade Vanilla Cream Caramels | Store-Bought Caramels |
|---|---|
| Uses real cream and butter | May use oils or emulsifiers |
| Rich vanilla bean flavor | Often artificial flavoring |
| Adjustable texture (soft/firm) | Standardized texture |
| Perfect for gifting | Generic packaging |
| No preservatives | Contains additives |
Also, there’s something deeply satisfying about cooking your own candy. Once you learn the process, it becomes a fun seasonal tradition. And if you’re looking to build a candy box or holiday gift bag, these are a standout addition.
Discover great ideas like our viral Dubai Chocolate Brownies with Pistachio to pair with your caramels for the ultimate dessert spread.
Ingredients You’ll Need for Vanilla Cream Caramels
Key Ingredients and Their Purpose
Crafting the perfect vanilla cream caramels starts with choosing the right ingredients. Each one plays a crucial role in achieving the soft, chewy, melt-in-your-mouth texture that defines this treat. Here’s a breakdown of what you’ll need and why it matters:
| Ingredient | Purpose in Caramel Making |
|---|---|
| Granulated Sugar | The core of the caramel. It caramelizes and gives structure. |
| Light Corn Syrup | Prevents crystallization, keeping the texture smooth. |
| Heavy Cream | Adds richness and creaminess; provides moisture. |
| Unsalted Butter | Contributes flavor and helps with a soft, luscious texture. |
| Vanilla Extract | Infuses the signature vanilla flavor (use real extract or bean). |
| Salt (optional) | Enhances all the flavors and balances sweetness. |
For vegan caramels, the key is using coconut cream and vegan butter. You’ll need to stir a bit more vigorously during cooking to prevent separation. Be mindful—these swaps will slightly alter the classic vanilla cream profile, but the result can still be absolutely delicious.
Learn more about flavor-packed baked creations like our Pineapple Juice Cake — another sweet favorite among our readers.
Essential Tools and Equipment for Candy Making
Why the Right Tools Make a Difference
When it comes to making vanilla cream caramels, precision is everything. This isn’t the type of recipe where you can eyeball measurements or guess temperatures. Using the correct tools ensures your caramel reaches the exact texture you want — soft, chewy, and never grainy or overcooked.
Even experienced home cooks sometimes skip key tools and end up with hard, sticky, or even burnt caramels. Let’s avoid that. Here’s how the right equipment makes your caramel game smoother, safer, and more predictable.
List of Recommended Tools for Beginners
You don’t need a full candy-making lab to make vanilla cream caramels at home — just a few essential items that make the process foolproof.
| Tool | Why It Matters |
|---|---|
| Candy Thermometer | Critical for hitting the right temp (usually 245°F – 250°F). |
| Heavy-Bottom Saucepan | Prevents hot spots and burning; ensures even cooking. |
| Silicone Spatula | Great for stirring; doesn’t stick or melt. |
| 8×8 or 9×9 Baking Pan | Used to pour the finished caramel for cooling and cutting. |
| Parchment Paper | Prevents sticking when pouring and storing caramels. |
| Sharp Knife or Scissors | For cutting neat, uniform squares. |
| Wax Paper or Wrapping Foil | Used for wrapping individual caramels. |
Pro Tip: Invest in a clip-on candy thermometer that stays in place during boiling. Digital ones can work too, but make sure they’re rated for high temperatures (at least 300°F). Accuracy is key — even a few degrees too high or low will make your caramel too soft or hard.
Looking for inspiration? Try our soft-and-creamy No Bake Orange Creamsicle Truffles — another easy dessert that benefits from good tools.
The Science Behind Creamy Caramels
How Sugar, Butter, and Cream Interact
Making vanilla cream caramels is more than just mixing ingredients — it’s a carefully balanced science of heat, fat, and sugar.
Let’s break down what’s happening in the pot:
- Sugar melts and caramelizes as it’s heated, creating that golden-brown color and rich flavor we all associate with caramels.
- Butter adds a soft, rich texture while also helping emulsify the mixture.
- Heavy cream cools the sugar down when added, but once reheated, it helps to dissolve the sugar crystals. This process gives caramels their creamy, chewy bite.
Here’s the thing: these ingredients don’t just “blend” together on their own. Heat changes their structure. That’s why timing and temperature matter so much in caramel making.
| Ingredient | Heat Reaction |
|---|---|
| Sugar | Melts and undergoes the Maillard reaction |
| Butter | Melts and adds emulsification |
| Cream | Adds moisture, softens sugar texture |
| Vanilla | Added last to preserve flavor |
When these ingredients are heated together gradually, they emulsify into a smooth, creamy mixture. The key is controlling the sugar’s temperature to avoid burning or undercooking.
Temperature Stages in Candy Making (Soft Ball, Firm Ball)
Temperature isn’t just a number on a thermometer — it’s a stage in the transformation of sugar. The texture of your finished caramels depends on reaching the right stage.
Here’s a simple chart to guide you:
| Stage | Temperature Range (°F) | Texture When Cooled | Use in Caramels? |
|---|---|---|---|
| Thread | 230°F–234°F | Syrupy | No |
| Soft Ball | 235°F–240°F | Soft, pliable, melts quickly | Too soft |
| Firm Ball | 245°F–250°F | Chewy, holds shape, not sticky | Yes |
| Hard Ball | 250°F–266°F | Very firm, tough | Too hard |
| Hard Crack | 300°F–310°F | Snaps easily | For lollipops |
For vanilla cream caramels, you’re aiming for the firm ball stage — around 248°F is the sweet spot. This gives your caramels that perfect chew without them sticking to your teeth or turning brittle.
Don’t miss our easy 6-Minute Caramel Recipe That Never Fails for a quick-start version if you’re short on time or just getting started.
Why Crystallization Happens — and How to Avoid It
Crystallization is the biggest threat when making caramels. If sugar crystals form, they can ruin the smooth texture and leave your caramels gritty. Here’s how to prevent it:
- Use corn syrup or another invert sugar to prevent crystals from forming
- Don’t stir once sugar starts boiling — agitating the mixture can cause crystals
- Brush down pan edges with water during boiling to stop crystals from climbing
- Use a clean pot and tools — any leftover residue can trigger crystallization
Making caramel is all about chemistry — and once you understand the reactions happening in your pot, it becomes much easier to control the final result.
Step-by-Step Vanilla Cream Caramels Recipe
This is the part you’ve been waiting for — the ultimate vanilla cream caramels recipe that delivers soft, chewy, melt-in-your-mouth goodness every single time.
Whether you’re making a batch for holiday gifts or just want a nostalgic homemade treat, follow these detailed steps to get consistent, delicious results.
Preparing Your Workstation
Before you even turn on the stove, preparation is key. Caramel happens fast, and there’s no time to fumble for tools once the sugar is bubbling.
What to do before cooking:
- Line an 8×8 or 9×9-inch pan with parchment paper, leaving overhangs on the sides for easy lifting.
- Set up your candy thermometer clipped to the side of your saucepan.
- Pre-measure all your ingredients. Trust us — when sugar reaches 245°F, you won’t have time to scramble.
You’ll need:
- 2 cups granulated sugar
- 1 cup light corn syrup
- 1 cup heavy cream
- ½ cup unsalted butter (1 stick), cubed
- 1 tsp pure vanilla extract (or ½ tsp vanilla bean paste)
- ¼ tsp salt (optional)
Cooking Process Explained Clearly
Now, let’s get cooking. This is a hands-on process — no distractions!
Step-by-step directions:
- Combine the sugar and corn syrup:
In a heavy-bottom saucepan, stir together sugar and corn syrup over medium heat until combined. No need to stir once it starts boiling. - Add the butter and cream slowly:
Once the mixture starts bubbling, carefully add the butter and half the cream. Stir gently until butter melts. - Heat it gradually:
Add the rest of the cream and insert your candy thermometer. Let it cook undisturbed until the temperature reaches 245°F–248°F. This takes around 15–20 minutes. - Add vanilla and salt:
Once it hits temperature, remove from heat and immediately stir in vanilla and salt. The vanilla will bubble up slightly — that’s normal. - Pour and cool:
Pour the hot caramel into your lined pan. Do not scrape the bottom of the pot — this can drag crystallized bits into your smooth batch. - Let it set:
Allow to cool at room temperature for 3–4 hours or until firm enough to cut.
Check out how we simplified baking with our Pineapple Juice Cake — it’s another crowd favorite you’ll love after your caramel success.
Pouring, Cooling, and Cutting Tips
Now that your pan of vanilla cream caramels is set and ready, it’s time to cut and wrap them — or eat them all (we won’t judge).
Cutting tips:
- Use a sharp, lightly oiled knife for clean cuts.
- For uniform pieces, measure into 1×1-inch squares.
- If caramels stick, chill them briefly in the fridge before cutting.
Wrapping ideas:
| Wrapping Material | Pros |
|---|---|
| Wax Paper | Easy to twist and seal ends |
| Parchment Squares | Elegant presentation |
| Foil Candy Wraps | Festive and professional-looking |
Wrapped caramels can be stored at room temperature for up to 2 weeks, or in the fridge for a month — if they last that long!
Don’t miss our sweet and soft Banana Zucchini Muffins for another nostalgic homemade favorite.
Flavor Variations to Try
Once you’ve mastered the classic vanilla cream caramels, it’s time to experiment. One of the best things about this recipe is how versatile it is. By tweaking just a few ingredients or adding flavor boosts, you can create gourmet-style caramels that cater to every taste — from rich and boozy to fruity and fun.
Salted Vanilla Cream Caramels
This is a modern twist that’s taken the candy world by storm — salted caramels. And for good reason. The combination of sweet, buttery caramel and a touch of flaky sea salt is irresistible.
How to make it:
- Sprinkle sea salt (like Maldon or fleur de sel) over the caramels just after pouring into the pan.
- Or stir ½ tsp of fine sea salt directly into the mix before pouring.
This variation pairs beautifully with dark chocolate, nuts, or even in caramel-dipped apples. It’s also a go-to gift option because it feels fancy but is super simple to make.
Maple, Chocolate, Bourbon, or Espresso Infusions
If you’re feeling bold, these infusions can take your vanilla cream caramels into gourmet territory.
| Flavor | How to Add It |
|---|---|
| Maple | Replace ¼ cup corn syrup with pure maple syrup |
| Chocolate | Add 2 oz of chopped dark chocolate when adding vanilla |
| Bourbon | Stir in 1 Tbsp bourbon off heat with vanilla |
| Espresso | Dissolve 1 tsp instant espresso in the cream before cooking |
Each of these adds depth and complexity without overpowering the vanilla base. Just be sure not to overdo the liquid additions — too much can throw off the caramel’s setting consistency.
Kid-Friendly Flavors vs Gourmet Variations
Not every flavor works for everyone. Here’s how to split your batch into crowd-pleasers for all ages:
| Audience | Best Flavor Ideas |
|---|---|
| Kids | Vanilla, chocolate swirl, peanut butter, marshmallow |
| Adults | Salted bourbon, espresso, cardamom, lavender, sea salt |
| Holiday Gifting | Maple pecan, pumpkin spice, cinnamon apple, gingerbread |
To create two flavors from one batch, simply divide the hot caramel and add mix-ins separately before pouring into side-by-side parchment-lined pans.
Discover great ideas like our Dubai Chocolate Brownies with Pistachio — another recipe perfect for adventurous flavor lovers.
Final Tips on Flavor Additions
Spices like cinnamon or nutmeg can be stirred in early during the boil.
Always add extracts, alcohol, or oils off heat, right after removing the caramel from the stove.
Too much added liquid can ruin the set — stick to no more than 2 tablespoons of any flavoring or infusion.
Common Mistakes and How to Avoid Them
Making vanilla cream caramels from scratch is part science, part art — and all about precision. But even a small misstep can lead to a batch that’s too hard, too soft, gritty, or sticky beyond reason. Don’t worry — we’re here to troubleshoot the most common problems and how to fix them so you never waste a batch again.
Grainy Texture? Here’s What Went Wrong
One of the most common issues in caramel making is crystallization — when sugar molecules clump back together, leaving your caramels with a sandy or gritty texture.
Causes of grainy caramels:
- Stirring too much after sugar starts boiling
- Sugar crystals forming on the side of the pan
- Impurities or leftover food in the pot
How to avoid it:
- Use light corn syrup or lemon juice to help prevent crystallization
- Once the sugar boils, stop stirring
- Dip a pastry brush in water and wipe down the sides of the pot to dissolve crystals
- Use a spotless pot and utensils
Caramels Too Hard or Too Soft?
This issue comes down to one thing: temperature. Caramels that don’t reach the right stage will never set properly.
| Problem | Temperature Issue | Fix for Next Time |
|---|---|---|
| Too Soft | Didn’t reach 245°F–248°F | Cook longer; check your thermometer’s accuracy |
| Too Hard | Overheated beyond 250°F | Remove earlier next time |
| Inconsistent | Uneven heating | Use a heavy-bottomed pot and stir evenly |
Pro Tip: Calibrate your thermometer by placing it in boiling water. It should read 212°F. If not, adjust your cooking target based on the difference.
Learn more about classic sweets that are hard to mess up, like our No Bake Orange Creamsicle Truffles — they’re creamy, light, and totally forgiving.
Sticky Caramels That Won’t Unwrap
If your vanilla cream caramels feel like they’re glued to the wrapper, they’re likely undercooked or not stored correctly.
How to fix or avoid it:
- Make sure you hit firm ball stage during cooking
- Allow full cooling time before cutting and wrapping
- Wrap in wax paper, not plastic — plastic sticks!
- Dust caramels lightly with cornstarch or powdered sugar before wrapping
Burnt Flavor or Brown Streaks
Burnt sugar doesn’t just ruin the flavor — it lingers in your kitchen like a bad memory. Most of the time, burning happens because the pot was too thin or the mixture wasn’t stirred evenly during the initial stages.
Tips:
- Use a heavy-bottomed saucepan (avoid thin aluminum)
- Stir only during the butter/cream phase, not during full boil
- Don’t leave the stove unattended — even for a minute
Check out other low-risk, flavor-packed bakes like our Banana Zucchini Muffins — a no-fail way to please the crowd.
Storing and Wrapping Your Caramels
After you’ve gone through all the effort of boiling, stirring, cutting, and cooling your vanilla cream caramels, don’t let them spoil or stick together in a baggie. How you store and wrap them makes all the difference in keeping their texture fresh and presentation flawless.
Best Ways to Store for Freshness
Proper storage ensures your caramels stay soft, chewy, and safe to eat for as long as possible. When left exposed, they can dry out, absorb moisture, or harden.
Here are a few tried-and-true storage tips:
| Storage Method | Lifespan | Best For |
|---|---|---|
| Airtight Container (Room Temp) | 2 weeks | Everyday snacking, gifting |
| Refrigerated in Wax Wrap | 1 month | Extended storage |
| Freezer (wrapped and bagged) | Up to 3 months | Large batch prep ahead of holidays |
Important tips:
- Wrap each caramel individually to avoid sticking
- Store in layers with parchment paper between them
- Keep out of direct sunlight or warm areas (they’ll melt or get greasy)
If stored correctly, these homemade vanilla cream caramels hold their shape, taste, and creamy texture for weeks — no preservatives needed.
Creative Wrapping Ideas for Gifting
Planning to give your caramels as gifts? Presentation matters just as much as flavor. And luckily, wrapping caramels is quick and surprisingly fun.
Here are a few charming, budget-friendly ways to do it:
| Wrapping Style | Supplies Needed | Looks Like |
|---|---|---|
| Classic Twists | Wax or parchment paper squares | Old-school candy shop |
| Foil Wraps | Colorful candy foil (Amazon or baking stores) | Gourmet boutique treat |
| Mini Boxes | Mini cardboard candy boxes, ribbon | Artisan bakery gift |
| Glass Jars | Mason jars + ribbon + gift tag | Rustic kitchen gift |
DIY Wrapping Tip: Cut parchment into 4×4-inch squares, place a caramel in the center, roll it, then twist both ends. Done. Add a sticker label or tie with baker’s twine for extra flair.
Don’t miss our holiday-ready Dubai Chocolate Brownies with Pistachio — another treat that packages beautifully for gifting.
Wrapping Tips to Prevent Sticking
- Avoid using plastic wrap — it sticks badly and looks unprofessional
- Use wax or parchment paper instead of foil if gifting in warm climates
- Lightly dust your caramels with powdered sugar or cornstarch before wrapping
- Let caramels cool completely before you start wrapping — even the slightest warmth can cause sticking
Whether you’re gifting for the holidays, a baby shower, or just because, wrapped vanilla cream caramels make a heartfelt, handmade treat that people genuinely love receiving.
Creative Ways to Use Vanilla Cream Caramels
Sure, vanilla cream caramels are amazing straight out of the wrapper — but did you know you can turn them into show-stopping desserts, sauces, and fillings too? Their soft texture and rich, buttery flavor make them ideal for both everyday treats and over-the-top desserts.
Here are some of the most mouthwatering ways to use your homemade caramels — no candy thermometer required this time.
In Desserts: Cookies, Cakes, Brownies
Vanilla caramels are an incredible addition to baked goods. Just chop them up and fold them into your favorite recipes for an extra gooey bite.
Try these caramel add-ins:
- Caramel Brownies: Drop chunks of caramels between layers of brownie batter before baking.
- Caramel-Stuffed Cookies: Wrap cookie dough around a small caramel square for a molten center.
- Caramel Banana Bread: Stir in diced caramels and drizzle with melted caramel post-bake.
Caramel adds moisture, flavor, and gooey texture to just about anything. Just be sure to slightly chill the dough if it’s sticky, as caramels can melt fast in the oven.
Check out our reader-favorite Banana Zucchini Muffins — a soft bake that pairs surprisingly well with caramel drizzle.
Melted as a Drizzle or Sauce
Homemade vanilla cream caramels melt beautifully into sauces for drizzling over ice cream, apple pie, or pancakes. All you need is a few minutes and a splash of cream or milk.
How to make quick caramel sauce:
- Place 10–12 caramels in a saucepan.
- Add 2–3 tablespoons of cream or milk.
- Heat on low, stirring until smooth.
- Use immediately or store in the fridge for 5 days.
Use this sauce for:
- Ice cream sundaes
- Waffles or French toast
- Coffee flavoring
- Cake filling or drizzle
It’s rich, velvety, and packed with that vanilla butter flavor your caramels already have.
Paired with Coffee or Ice Cream
Don’t underestimate the power of simple pairings. Vanilla caramels elevate everyday favorites:
- Coffee Companion: Enjoy with a cup of black coffee or espresso for a sweet contrast.
- Ice Cream Topping: Dice and sprinkle over vanilla, chocolate, or butter pecan.
- Cheeseboards: Add soft caramel squares to a platter with fruits, nuts, and cheeses.
These simple additions make your caramels feel gourmet, even without baking or melting them.
Looking for inspiration? Try pairing caramels with bold flavors like in our Pineapple Juice Cake — sweet, fruity, and just a little tangy.
Print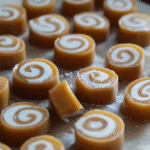
How to Make Perfect Vanilla Cream Caramels at Home (Step-by-Step Guide)
- Total Time: 35 minutes
- Yield: 64 caramels 1x
Description
Soft, buttery, and rich with vanilla flavor, these homemade caramels melt in your mouth and make the perfect treat or gift.
Ingredients
- 2 cups granulated sugar
- 1 cup light corn syrup
- 1 cup heavy cream
- ½ cup unsalted butter (1 stick), cubed
- 1 tsp pure vanilla extract (or ½ tsp vanilla bean paste)
- ¼ tsp salt (optional)
Instructions
- Line an 8×8 or 9×9-inch pan with parchment paper, leaving overhang on the sides.
- In a heavy-bottom saucepan, stir together sugar and corn syrup over medium heat until combined.
- Once bubbling, add butter and half the cream carefully. Stir until butter melts.
- Add the remaining cream and insert a candy thermometer.
- Cook without stirring until the mixture reaches 245°F–248°F.
- Remove from heat and stir in vanilla and salt.
- Pour into the prepared pan without scraping the bottom of the pot.
- Let cool at room temperature for 3–4 hours until firm.
- Cut into squares and wrap in wax paper.
Notes
Store wrapped caramels in an airtight container for up to 2 weeks at room temperature or longer in the fridge. Perfect for gifting or holiday treat boxes.
- Prep Time: 10 minutes
- Cook Time: 25 minutes
- Category: Candy
- Method: Stovetop
- Cuisine: American
Nutrition
- Serving Size: 1 caramel
- Calories: 70
- Sugar: 10g
- Sodium: 15mg
- Fat: 3g
- Saturated Fat: 2g
- Unsaturated Fat: 1g
- Trans Fat: 0g
- Carbohydrates: 10g
- Fiber: 0g
- Protein: 0g
- Cholesterol: 10mg
Keywords: vanilla cream caramels, homemade caramels, soft caramels, holiday candy
Seasonal & Special Occasion Ideas
If you’re making caramels around the holidays or for parties, consider:
- S’mores Upgrade: Replace chocolate with a caramel square — then roast
- Holiday Bark: Melt chocolate, scatter chopped caramels + nuts, and refrigerate
- DIY Candy Bars: Layer caramel, pretzels, and peanuts over chocolate in molds
Versatile, crowd-pleasing, and melt-in-your-mouth good — there’s no wrong way to use vanilla cream caramels once you’ve made them.
FAQs About Vanilla Cream Caramels
How long do homemade vanilla cream caramels last?
If wrapped individually and stored in an airtight container, vanilla cream caramels last up to 2 weeks at room temperature, 1 month in the fridge, and up to 3 months in the freezer. Keep them cool and dry to maintain their texture.
Why did my caramels turn out too hard or too soft?
The texture depends on the temperature during cooking.
- Too soft = didn’t reach 245°F
- Too hard = exceeded 250°F
Use a reliable candy thermometer and aim for 245–248°F for chewy perfection.
Can I make vanilla cream caramels without a thermometer?
You can try using the cold water test: Drop a bit of the mixture into ice water. It should form a firm but pliable ball (firm-ball stage). That said, a thermometer is highly recommended for consistency.
What’s the best cream to use for caramels?
Always use heavy cream (whipping cream) with a fat content of 35% or higher. Avoid using milk or light cream — they won’t deliver the same richness or structure.
Are vanilla cream caramels gluten-free?
Yes — as long as you use pure vanilla extract and gluten-free corn syrup, your caramels are naturally gluten-free. Always check labels if you’re cooking for someone with celiac.
How do I wrap caramels for gifting or storage?
Use wax paper or parchment squares, twisting the ends for a classic look. Store them in a box, tin, or glass jar with ribbon for easy gifting. Avoid plastic wrap — it sticks and can affect texture.
Conclusion
Vanilla cream caramels aren’t just a recipe — they’re a tradition. A gift. A labor of love. With the right ingredients, tools, and techniques, anyone can master the art of making these chewy, buttery candies at home.
You’ve now got the full roadmap:
- From ingredients to candy science
- Tools to temperature timing
- Wrapping ideas to recipe twists
Whether you stick to the classic or try your hand at maple bourbon or salted espresso, homemade caramels will always deliver that handcrafted magic no store-bought version can touch.
Don’t miss our beginner-friendly 6-Minute Caramel Recipe That Never Fails — perfect for last-minute cravings.
Stay sweet, and keep stirring.
For daily recipes you can follow me on Facebook and Pinterest.